Quick Start
Installation
First things first, head over to the Chrome Web Store and add Unakite to your Chrome browser.
Log in
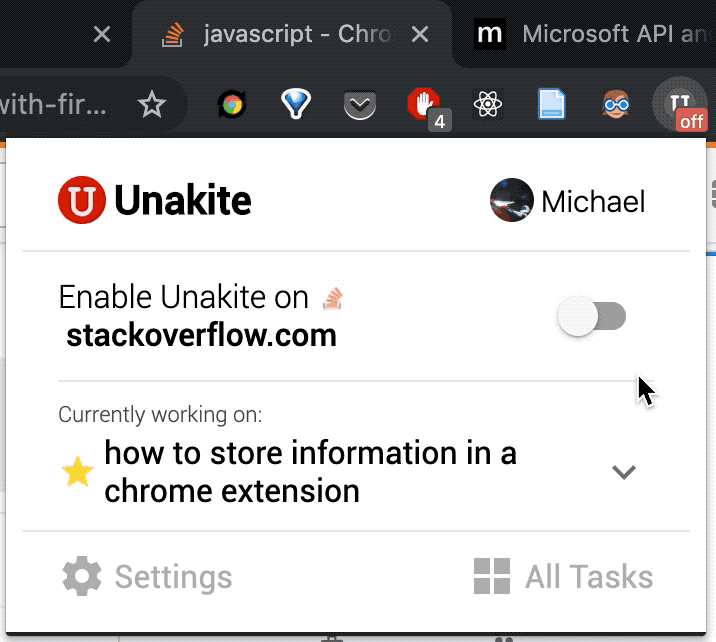
Once installed, there should be a
![]() icon in your extension list area to the right of the address bar. Click the
icon in your extension list area to the right of the address bar. Click the
![]() icon to bring up the Unakite browser popup. Then click the Log In button to log in.
icon to bring up the Unakite browser popup. Then click the Log In button to log in.

This will bring you to the Unakite authentication page. Then follow the on-screen instructions to log in with your Google account. After you are logged in, Unakite will bring you back to the tab you were previously on.
You only have to log in once until the next time you log out.
Accessing the Sidebar and the Clipper
Unakite's main functionalities are by default disabled after installation and authentication. This is to prevent disrupting your normal browsing experience (though we carefully designed Unakite to have minimal interference). Sometimes, you might not want Unakite to be your copilot such as when using Facebook or online banking.
You'll have access to the Unakite sidebar and the clipping functionalities once you enable Unakite on specific domains from the Unakite browser popup. For exmaple, to enable Unakite on stackovewflow.com, (that is, enable Unakite functionalities on current and all future visits to Stack Overflow), first navigate to a Stack Overflow page, and then toggle Unakite to be on like below:
Once toggled on, the clipping functionalities are automatically enabled. The sidebar is then accessible through a Open Unakite Sidebar button at the bottom-right corner of the page:
If you prefer a keyboard shortcut to show/hide the sidebar, use Ctrl + Esc (on macOS) or Ctrl + ` (backtick) (on Windows and Linux).
Disabling Unakite works the same way
Create a Task
A task represents a problem that you're trying to solve or a decision that you're trying to make.
As you start a task that you would like to keep track of using Unakite, just bring out the sidebar and click the Creating A New Task link.

Now there's a lot you can do with the tasks you created! --> How to create, update, comment, delete tasks, and more!
Start Collecting
Unakite provides a light-weight clipping tool for you to quickly grab almost any information as you browse the web. When Unakite is enabled, you can start clipping by:
-
highlighting text on any webpage
-
hold the
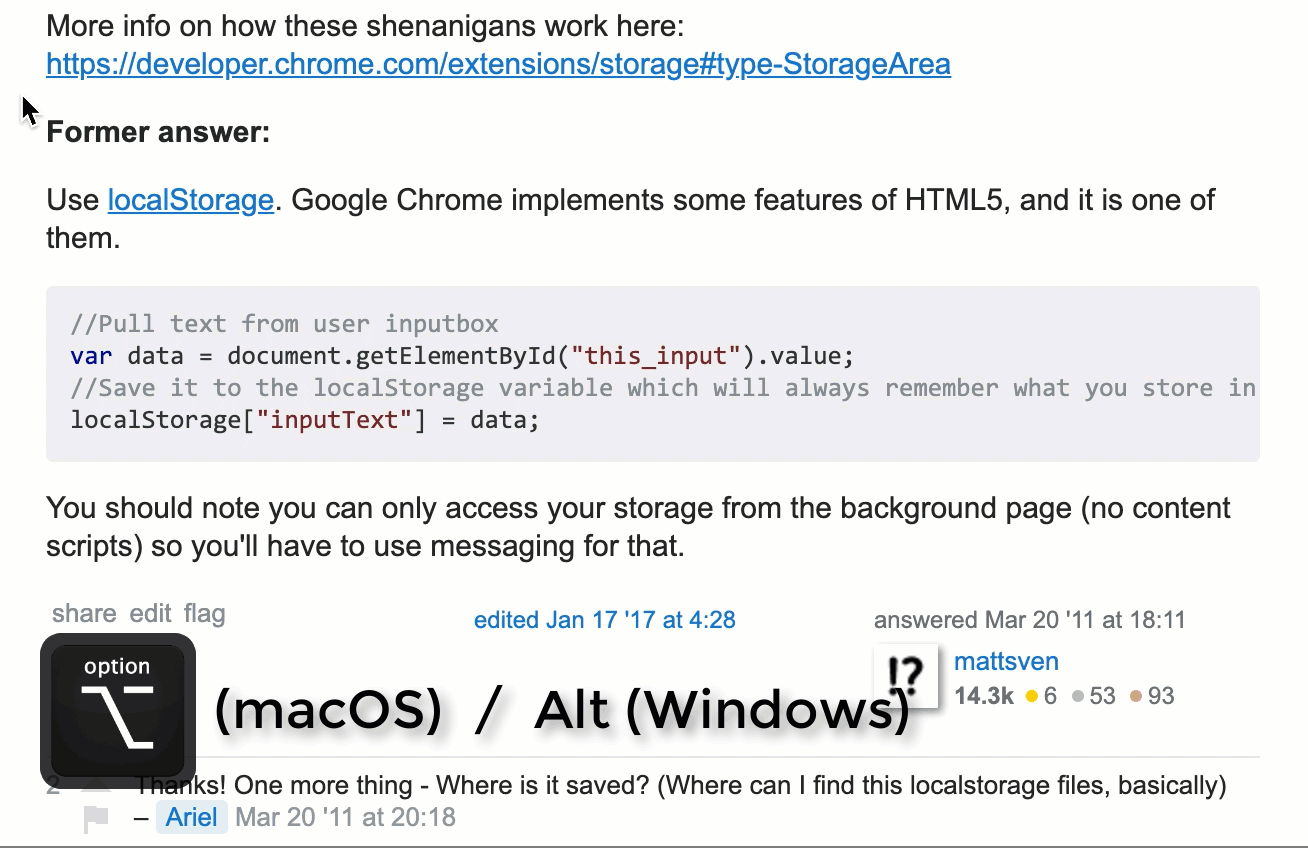
Option(on macOS) orAlt(on Windows and Linux) key and draw a bounding box around the area of interest (illustrated below)
Text Highlighting
When you encounter some text you'd like to grab, simply use your cursor to select (highlight) that text and click the clip button that says "Save to
![]() " to collect.
" to collect.
Drawing a Bounding Box
Sometimes it's easier to just draw a box around the area you would like to clip. Fortunately, Unakite supports just that! Simply hold the Option (on macOS) or Alt (on Windows and Linux) key and draw a bounding box around the area of interest, and click the clip button to collect it.
Note that under most circumstances, collecting through drawing bounding boxes will automatically grab the HTML (with the original style) as well as an image screenshot of the content inside the box as the content of the snippet. These can later be viewed in the snippet repository.
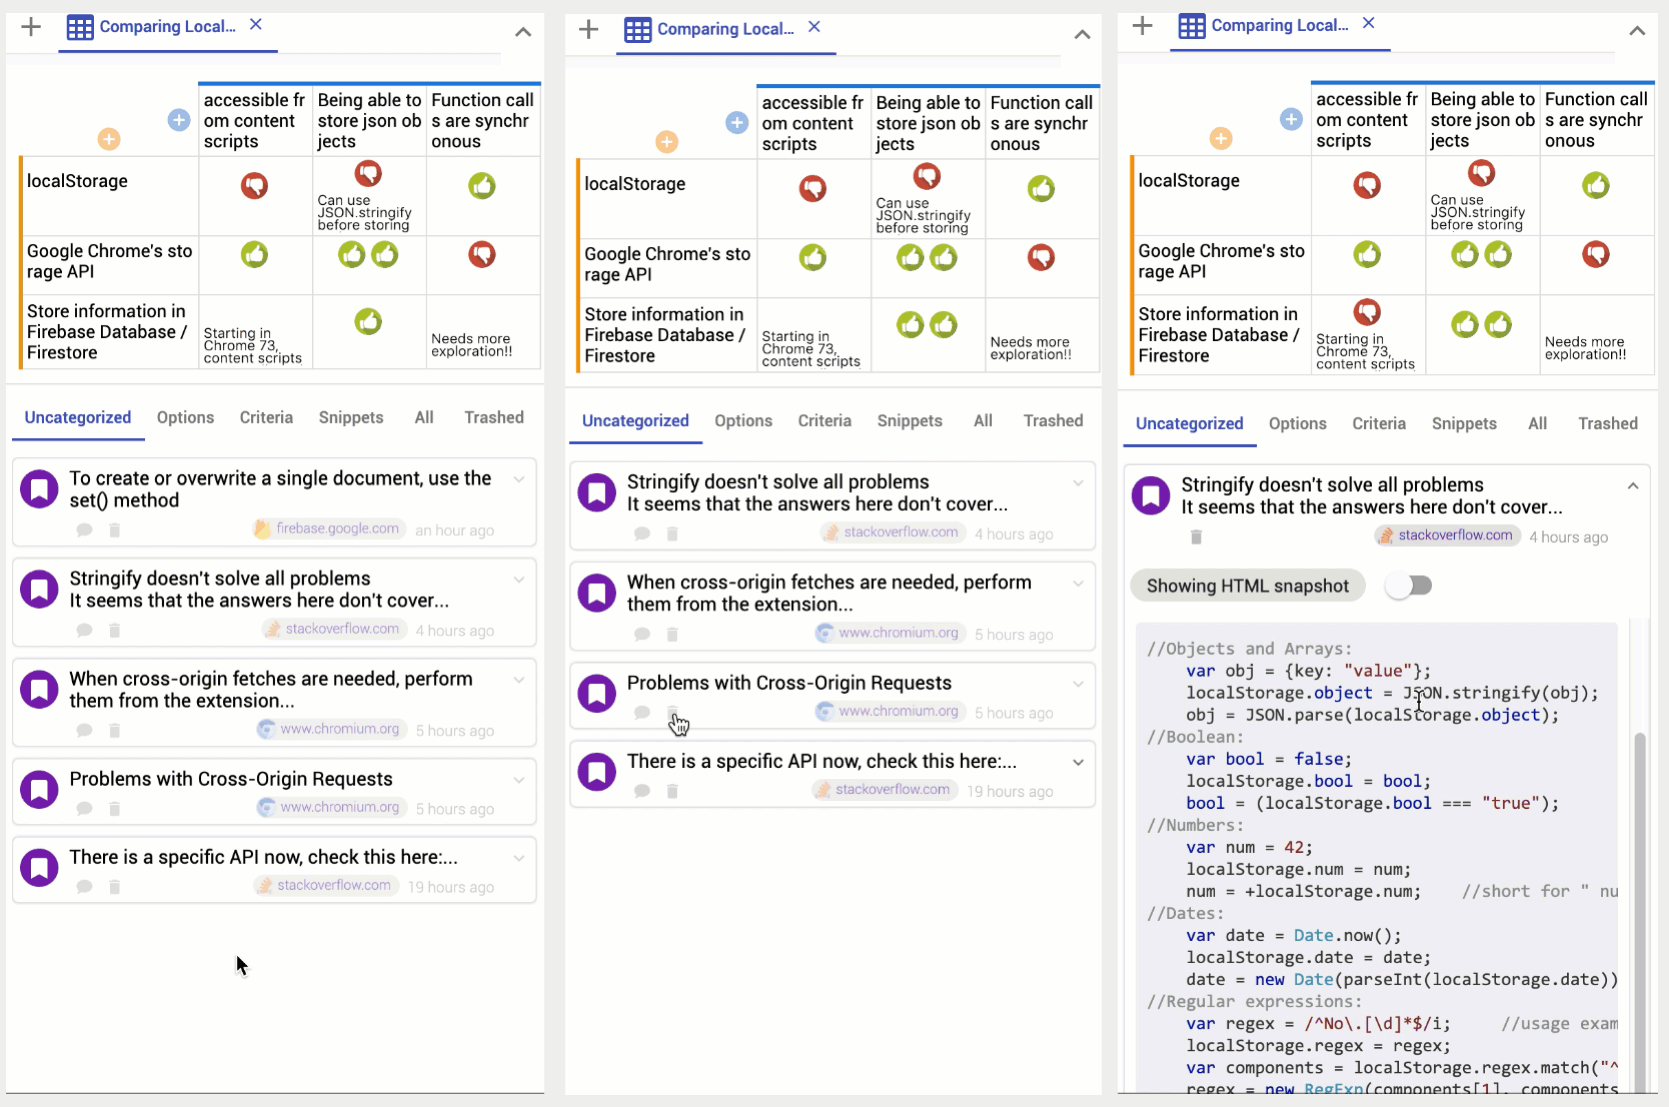
All the snippets you collected can be accessed through the snippet repository in the sidebar and the task detail view.

Organizing
You might want to give some sort of structure to all the information snippets you collected to help you stay organized. This could happen when you're half way through your exploration, or after you completed your collecting phase, or even before you started your exploration.
Unakite offers a versatile table-building tool to help you quickly build up comparison tables with the information you collected. This part of the documentation will walk you through all the features available for you to build your own tables.

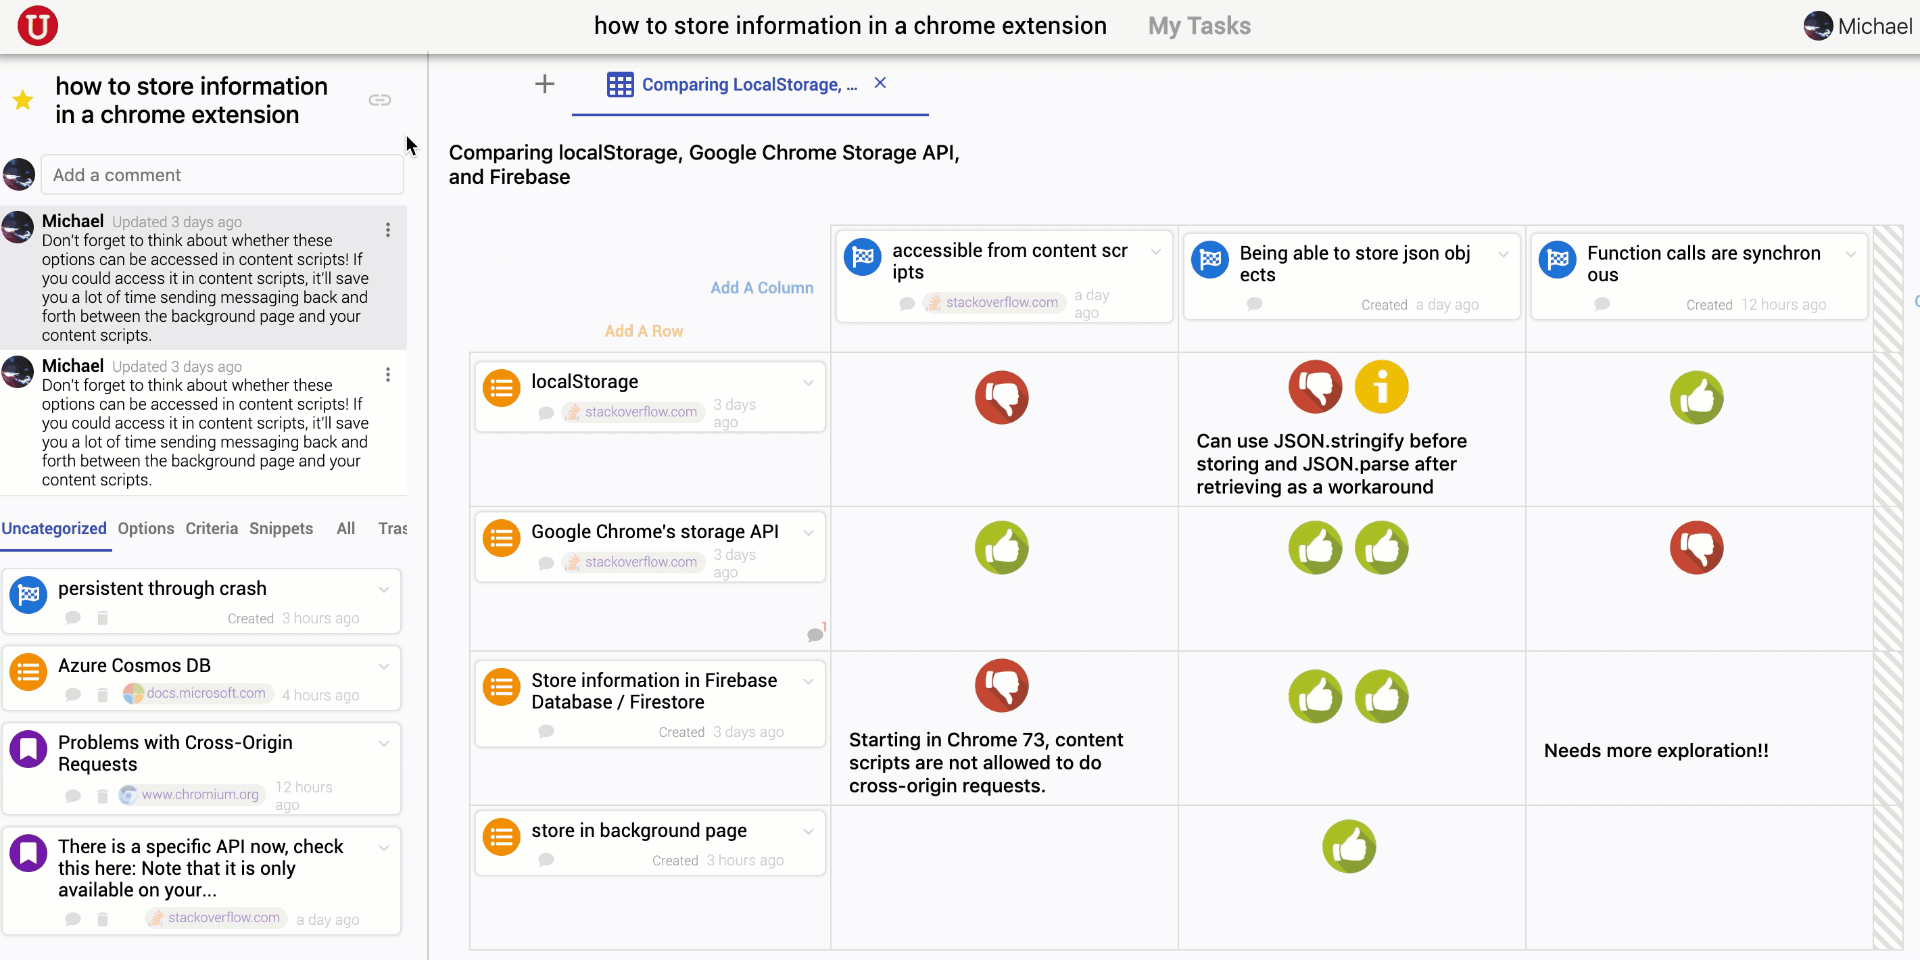
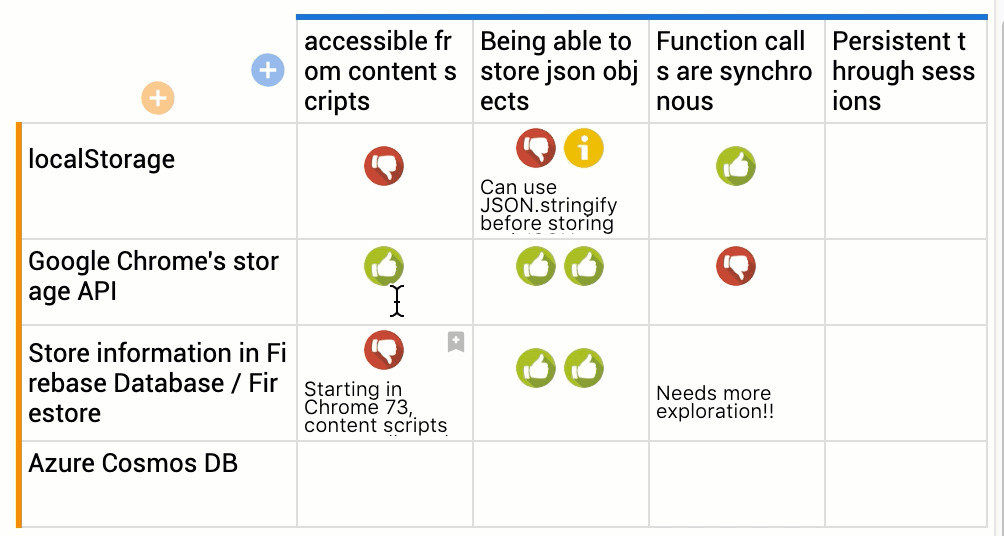
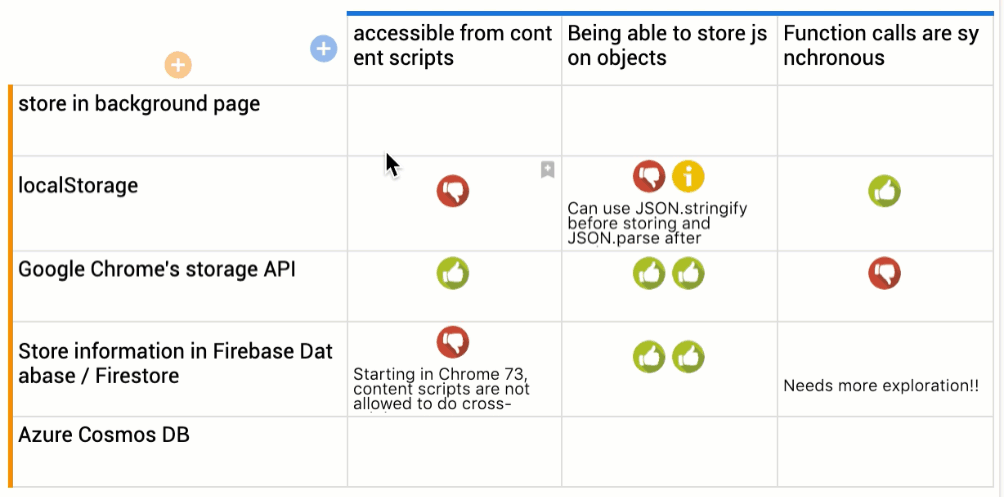
A Unakite table is organized in the following way:
-
Each row header contains an option
-
Each column header contains a criterion
-
All other regular table cells contain evidence describing the relations / characteristics of their corresponding option and criterion.
-
A positive rating icon (
 ) is used to denote a positive relation, such as "React.js is great in terms of having a very short loading time".
 -
A negative rating icon (
 ) is used to denote a negative relation, such as "Bubble Sort is bad in terms of speed".
 -
An info icon (
 ) is used to represent supporting information.
-
Put Existing Snippets into a Table Using Drag & Drop
To put the snippets you collected into the table, simply drag the desired snippet card from the snippets collection and drop it into a table cell as illustrated below. Note that each cell is divided horizontally into three areas, for positive, negative and info ratings, so your snippet will be rated based on where you drop it.
You can also drag snippets into row headers or column headers to make them options or criteria:

Once snippets are dragged into the table, they disappear from the Uncategorized tab at the bottom, and are then available from the tab related to where you dropped it.
Create Snippets Directly in a Table
Sometimes, you might want to incorporate some of your own knowledge into the table that is not necessarily snipped from the web. This might be an option or criterion you've already came across, or a piece of evidence that you've already known for sure. Unakite allows you to do that as well! The next section shows how easy it is to create options, criteria, and ratings directly in the table.
Create Options and Criteria
To create an option in the table, simply add a new row using the orange (row) plus sign, and type the option name into the new row header. Similarly, to create a criterion, simply add a new column by clicking on the blue (column) plus sign, and type the criterion name into the new column header.
Create Snippets as Evidence / Ratings
To create a new snippet and use it as a rating, simply mouse over the desired cell and click the Add a new snippet button (
 ) which appears on the top-right corner of the cell. Use the popup box to choose the desired rating type and type in the snippet content, and then click the save button to save the snippet directly into this table cell as a rating.

Here's more on other cool things you can do with the table building tool, such as quickly changing rating types, removing ratings from a table, switching rows and columns, hiding rows and columns, and much more.
Share Tasks
After finishing your task, you might want to share it with someone else, link the task to the actual code you're working on, or even keep it around for future reference.
We have some good news! All the tasks in Unakite can be accessed through a unique url. You can choose to share the link with your friends and colleagues, embed it in your code in the form of /* comments */, or really just do anything you want with it. The editing / commenting accesses are automatically taken care of.
Get The Unique URL To a Task
To obtain the unique url of a task, hit the Open Task Detail Page button on the sidebar. This will take you to the task dashboard / detail page. The url of this page is the unique url for this task. Alternatively, you can also click the Get sharable link button at the top left of the Unakite page, to copy the unique url into your clipboard.